
RONDINE JR / RA-6 IMPROVED ANTI-SKATE ADJUSTMENT
Although we recommend a minimum tracking force of 2.0 grams, some may wish to try for less, or desire a more linearly applied, and/or higher anti-skating force. When using 2.0 grams, or higher, tracking force, these adjustments and modifications will provide you with little improvement. However, together they have proven to provide very accurate anti-skating calibration over the range of 1 to 3 grams.
These modifications will require some modest mechanical skill, good lighting, and suitable hand tools, such as, a philips-head screwdriver, 2.5 mm hex wrench, needle-nose pliers, and a small diagonal cutter. The first modification requires basic skills, while the second requires a bit more. You be the judge.
We assume no responsibility for a mistake or breakage of any parts. So, proceeding will be solely at your responsibility.
1) Lay the turntable on a soft surface, such as a pillow, sponge rubber sheet, or carpet.
2) Remove the 9 Philips-head screws that hold on the bottom cover.
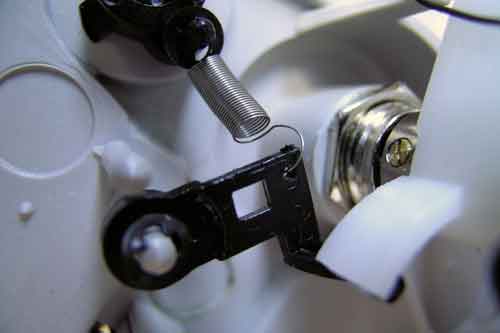
3) Locate the anti-skating control bottom. Notice how the spring is looped around the small black plastic lever.
BASIC ADJUSTMENT FOR MORE EVENLY APPLIED TRACKING FORCE
4) Move the arm all the way to the center of the platter as far as it will go (the weight will usually hit against the anti-skate knob on top and limit further movement of the arm).
5) Loosen the hex nut slightly with the 2.5 mm hex wrench, and also the philips-head screw.
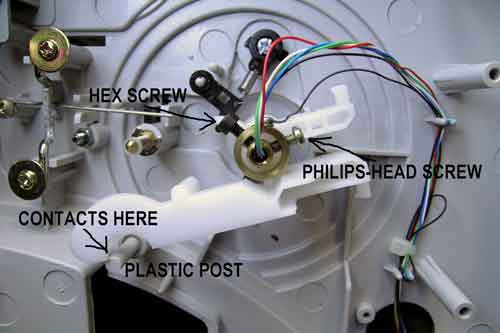
6) Rotate the long white plastic piece in a counter-clockwise direction a bit more till it contacts the plastic post protruding from the base bottom.
7) Retighten the two screws previously loosened.
MODIFICATION FOR HIGHER ANTI-SKATING FORCE
8) Using long-nosed pliers, unclip the spring from the plastic lever. Use care as to not break the plastic lever. You may have to carefully unwrap a turn or two of spring.
9) Using a small diagonal cutter, snip off about 1/8" or 3 mm of the end of he spring.
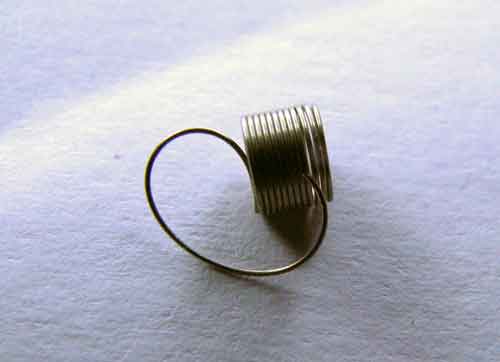
10) Using the long-nosed pliers, reform a full loop on the end of the remaining clip and fasten the spring to the black plastic lever.
11) Replace the cover and you are finished.