There are few adjustments necessary beyond setting height. You want the arm tube to set parallel to the average record. So, get a junk record (unless you are extremely careful), and loosen the 2.5 mm set screw in the arm base Then, pull up the arm till the arm tube is parallel to the record. Then tighten the nut.
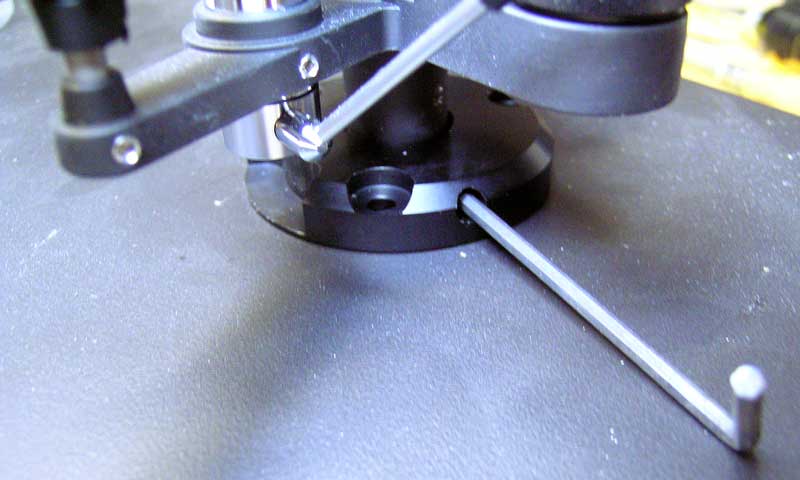
That is easy, but now you want to make sure the arm can rotate to end of most records, and that the arm lift operates over the whole surface of the record. If you notice the little lift platform under the arm, near its pivot, will give you a good clue. I good rule of thumb is to set the arm into its arm rest, then (with the arm height set screw still loosened) rotate the arm till the head is about 2 inches to the right of the platter edge. Then tighten the set screw nut. That would put the arm rest pointing close to straight forward.
That is all that is necessary for 95% of the cases. Sometimes you may have extra thick records (Edison) or a phono cartridge that is very tall or very short. Then, you may have to move the cuing (arm lift) up or down a bit. That requires a small (1.5 mm) hex wrench to move it up or down.
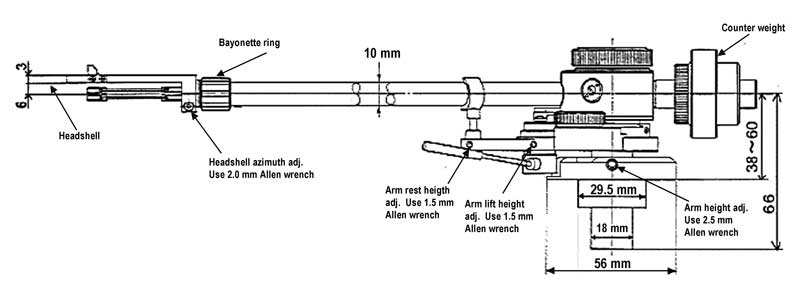
Setting stylus pressure is easy. Turn the anti-skating knob to 0. Then rotate the weight on back till the arm is in balance and tends to stay parallel to the base. Next, rotate the loose reticule on the weight till 0 lines up with the mark on the arm. So, the arm is now in balance, exerting no downward pressure, and the reticule reads zero. Rotate the entire weight in the direction of increasing numbers and set the stylus pressure, i.e., 1.5 means 1.5 grams. Next set the anti-skating knob to the same number.